The costs of painting your windows
The Costs Of Painting Your Windows Painting Windows: An overview of the costs Are your windows in need of a fresh coat of paint? Then
Michael is one of our professional decorators and in this article, he will provide some tips on how to paint your kitchen cabinets.
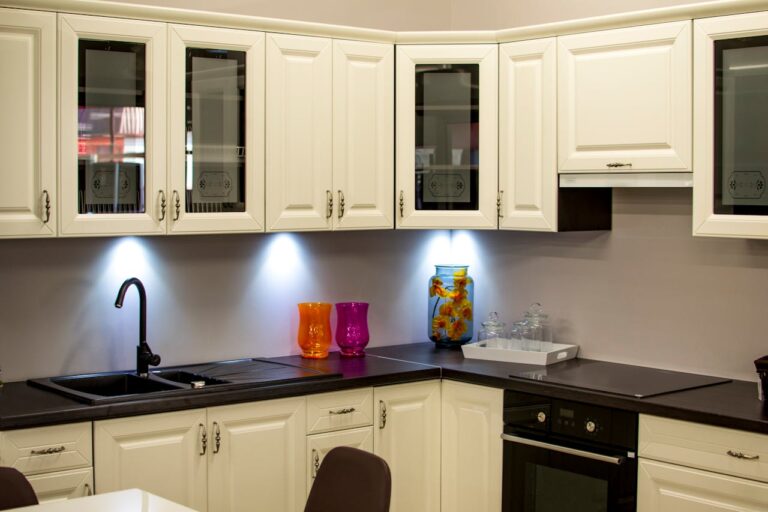
If you’re looking to give your kitchen a fresh new look without breaking the bank, painting your cabinets is a fantastic DIY project. As a professional painter, I’m here to guide you through the process step by step. Let’s get started!

Professional painter based in Manchester

First things first, take a good look at your cabinets. Ensure they’re in decent shape and the current layout works for you. If they’re falling apart or you dislike the setup, painting might not be the best solution.
Knowing what your cabinets are made of is crucial:
Solid Wood or Painted Wood: These are ideal for painting. The natural grain provides a good surface for paint to adhere to.
Laminate-Wrapped: These have a plastic-like finish. You can paint them, but you’ll need a high-quality, shellac-based primer to ensure the paint sticks.
Plastic or Vinyl-Wrapped: Not the best candidates for painting. The smooth surface makes it challenging for paint to adhere properly, and the results might not be durable.
Here’s what you’ll need:
Cleaning Supplies: A multipurpose degreaser to remove grime and grease.
Filler: For patching up any nicks or dents.
Sandpaper: 120-grit works well.
Sanding Block or Orbital Sander: To smooth surfaces
Dust Mask: Safety first! If you are going to sand, protect your lungs from inhaling dust.
Primer: Essential for a lasting finish.
Top Coat Paint: Choose a durable paint suitable for kitchens. Deluxe is a quality brand
Paint Brushes and Rollers: Choose a varity of different sizes. No need to pick big rollers, remember we are painting cabinets not walls.
Painter’s Tape: To protect areas – such as glass – that you don’t want painted.
Drop Cloths or Old Sheets: To protect your floors and countertops.

Remove Hardware: Take off all handles, knobs, and hinges. Store them safely if you plan to reuse them. Best to keep the screws in a plastic bag so you know which screw belongs to what element
Fill Imperfections: Use filler to patch up any dents or holes. Once it’s dry, sand it smooth.
Sand Surfaces: Lightly sand all areas to be painted. This creates a surface the paint can grip onto.
Protect Surroundings: Use painter’s tape to mask off areas you don’t want painted, and lay down drop cloths to protect your floors and countertops.

Choose the Right Primer: For laminate surfaces, a shellac-based primer is recommended.
Apply Primer: Use a brush for corners and detailed areas, and a roller for larger surfaces. Allow it to dry as per the manufacturer’s instructions.
Once the primer has dried up its time to start painting.
Select Quality Paint: Opt for a paint designed for kitchen cabinets. Satin or semi-gloss finishes are durable and easy to clean. A quality brand like Deluxe can be found at your local DIY store.
Apply Paint: Start with a brush for edges and detailed spots, then use a roller for flat surfaces. Apply thin, even coats.
Multiple Coats: Two to three coats may be necessary. Ensure each coat dries thoroughly before applying the next.

Reattach Hardware: Once the final coat is completely dry, reinstall your handles, knobs, and hinges.
Rehang Doors and Drawers: Carefully put everything back in place.
Inspect Your Work: Look over your cabinets for any missed spots or touch-ups needed.
Clean Up: Remove all painter’s tape and drop cloths. Give your kitchen a good clean to enjoy your refreshed space.

The Costs Of Painting Your Windows Painting Windows: An overview of the costs Are your windows in need of a fresh coat of paint? Then

How To Properly Remove Wallpaper Michael is one of our professional decorators and in this article, he provides some guidance on how to remove wallpaper

How To Paint Roller Shutters Michael is one of our professional decorators and in this article, he provides some guidance on how to paint roller
| Cookie | Duration | Description |
|---|---|---|
| cookielawinfo-checkbox-analytics | 11 months | This cookie is set by GDPR Cookie Consent plugin. The cookie is used to store the user consent for the cookies in the category "Analytics". |
| cookielawinfo-checkbox-functional | 11 months | The cookie is set by GDPR cookie consent to record the user consent for the cookies in the category "Functional". |
| cookielawinfo-checkbox-necessary | 11 months | This cookie is set by GDPR Cookie Consent plugin. The cookies is used to store the user consent for the cookies in the category "Necessary". |
| cookielawinfo-checkbox-others | 11 months | This cookie is set by GDPR Cookie Consent plugin. The cookie is used to store the user consent for the cookies in the category "Other. |
| cookielawinfo-checkbox-performance | 11 months | This cookie is set by GDPR Cookie Consent plugin. The cookie is used to store the user consent for the cookies in the category "Performance". |
| viewed_cookie_policy | 11 months | The cookie is set by the GDPR Cookie Consent plugin and is used to store whether or not user has consented to the use of cookies. It does not store any personal data. |